.svg?fit=cover)
Uniform Component Starter Kit
Get Started
This starter is using the latest Next.js 15 App Router.
Prerequisites
- A Uniform account with the ability to create a new empty project. If you don't have a Uniform account, you can request a trial account here.
- Node.js LTS and
gitinstalled on your machine.
Initial setup
With Uniform CLI
- Run
npx @uniformdev/cli newand pickNext.js->Component Starter Kitfrom the interactive prompt to complete the process to deploy a new instance of CSK to your Uniform team.
Manually
- Clone the repo to your locale machine
https://github.com/uniformdev/component-starter-kit-next-approuter - Setup your .env file (see .env.example for reference)
UNIFORM_API_KEY=
UNIFORM_PROJECT_ID=
UNIFORM_PREVIEW_SECRET=hello-world
Make sure your API key has "Developer" role to be able to push content.
- Run
npm installto install dependencies npm run initto push initial content and design extension settings into your empty projectnpm run devto run the app in dev mode on http://localhost:3000
Run locally in dev mode
npm run dev to run locally. At this point, you should be able to browse your site on localhost:3000 and open it in Uniform Canvas.
Install Design Extensions
This integration brings Canvas UI extensions for theme management and new useful visual parameters to help control the look and feel of your components.
- Open your project.
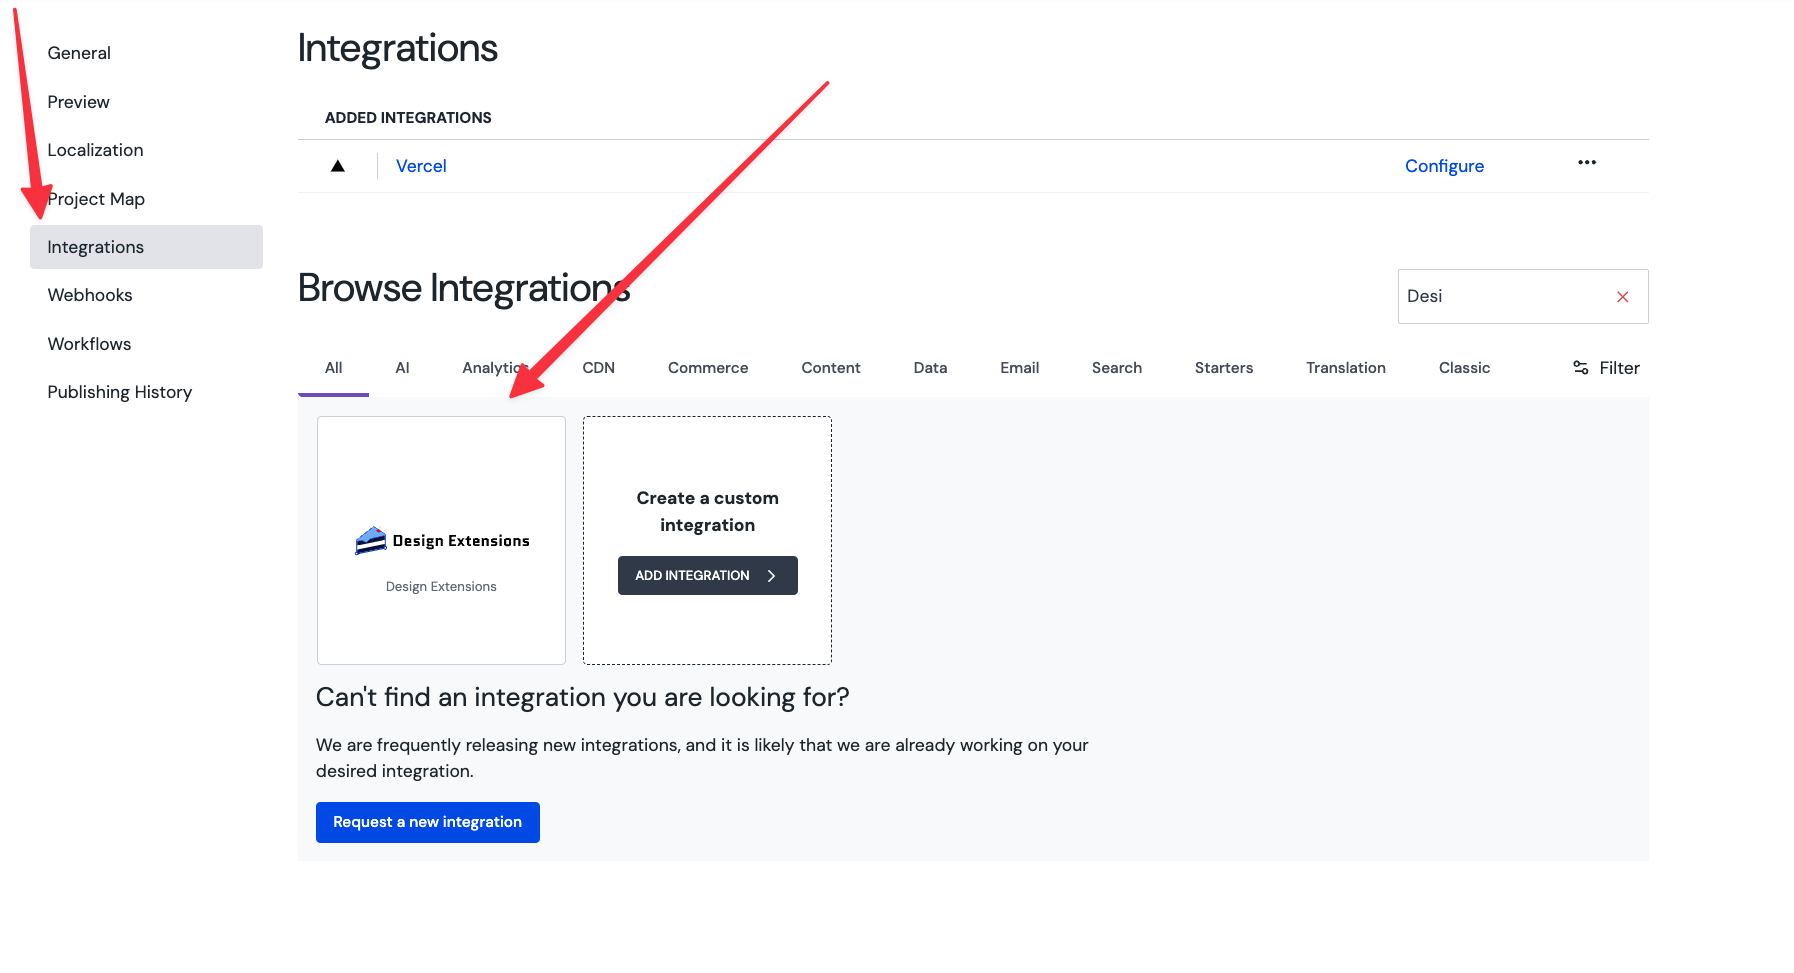
- Navigate to the
Integrationstab, find theDesign Extensionsintegration and install it.
Syncing Uniform content
To manage and synchronize content effectively between your local environment and your Uniform project, you can use a set of commands that handle the pushing, publishing, and pulling of content. These commands help ensure that your content is up-to-date and any personalization configurations are properly set up in your project. Below are the essential commands and their purposes:
1. Push Local Content to Project:
To synchronize the content you have on your local disk with your project, use the command:
npm run push:contentThis command uploads the content files located in the./content directory to your Uniform project, ensuring any local changes are reflected in the project. This step is essential for keeping your local content and the project’s remote content in sync.
2. Publish Personalization Configuration:
Once you’ve set up or modified any personalization settings in the manifest, you need to publish them to make sure they’re active in your project. Run:
npm run uniform:publishThis command sends the personalization configurations defined in the manifest file to Uniform, making them available for use in your project’s content delivery. This step is critical after any changes to personalization logic or targeting settings.
3. Pull Content from Uniform:
If you want to update your local files with the latest content from Uniform, use:
npm run pull:contentThis pulls the latest content from Uniform and saves it to the./content directory on your local machine. It’s useful when you want to work with the latest updates or adjustments made by collaborators on the remote Uniform project.
These commands streamline the workflow between your local environment and Uniform, allowing for efficient content management, personalization setup, and collaborative updates.